Some files need a password before anyone can open them. Some should be gone for good, not just moved to the Recycle Bin. A USB flash drive you lend to another computer should stay readable for programs, but not writable or deletable. And sometimes Windows refuses a delete because another program still has the file open.
File Security in Windows Manager covers those jobs in one window: encrypt, decrypt, shred, set NTFS permissions, and unlock a file or folder that is in use. You add items with the buttons on the right, or drag them in from File Explorer.
This guide follows the five pages, the password rules, and the cases you should leave alone, including Windows system files.
1. What can File Security do?
- Encrypt File. Protect files with a password. Each file is replaced by a .lock file. Without the password, the original content cannot be restored.
- Decrypt File. Turn .lock files back into the original files. A wrong password is rejected. A file that has been altered is reported as invalid or tampered with.
- Shred File. Overwrite the file contents and then delete the file. Shredded files cannot be recovered.
- File & Folder Permission. On an NTFS drive, set files and folders to read-only. Executable still lets files such as EXE and BAT run. Undeletable stops them from being deleted.
- File & Folder Unlocker. When Windows says a file is open in another program, find the process that holds it and unlock the path so you can modify or delete it.
2. How to open File Security
Open File Security from the Windows Manager main window. The window has five tabs:
- Encrypt File
- Decrypt File
- Shred File
- File & Folder Permission
- File & Folder Unlocker
On Encrypt, Decrypt, and Shred, the list shows Files and Result. On Permission and Unlocker, the list shows Files and Folders and Status. The buttons on the right add or remove list items and start the action for that page.
The same actions are available from File Explorer. Press Add to Context Menu on a page. The button stays pressed while that command is on the right-click menu for files and folders. Press it again to remove the command.
The question mark at the right of the status bar shows a short summary: encrypt, decrypt, or shred files; set NTFS permissions with Executable and Undeletable; unlock a file another program still has open; add items with the buttons or by dragging them from File Explorer. It also warns you not to change system files. Under that text, Online Help opens this page.
Remove Selected and Remove All only take items off the list. They do not delete, shred, or decrypt the files on disk.
3. Encrypt files
On Encrypt File, click Add File or Add Folder, or drag files and folders in from File Explorer. Then click Encrypt File.
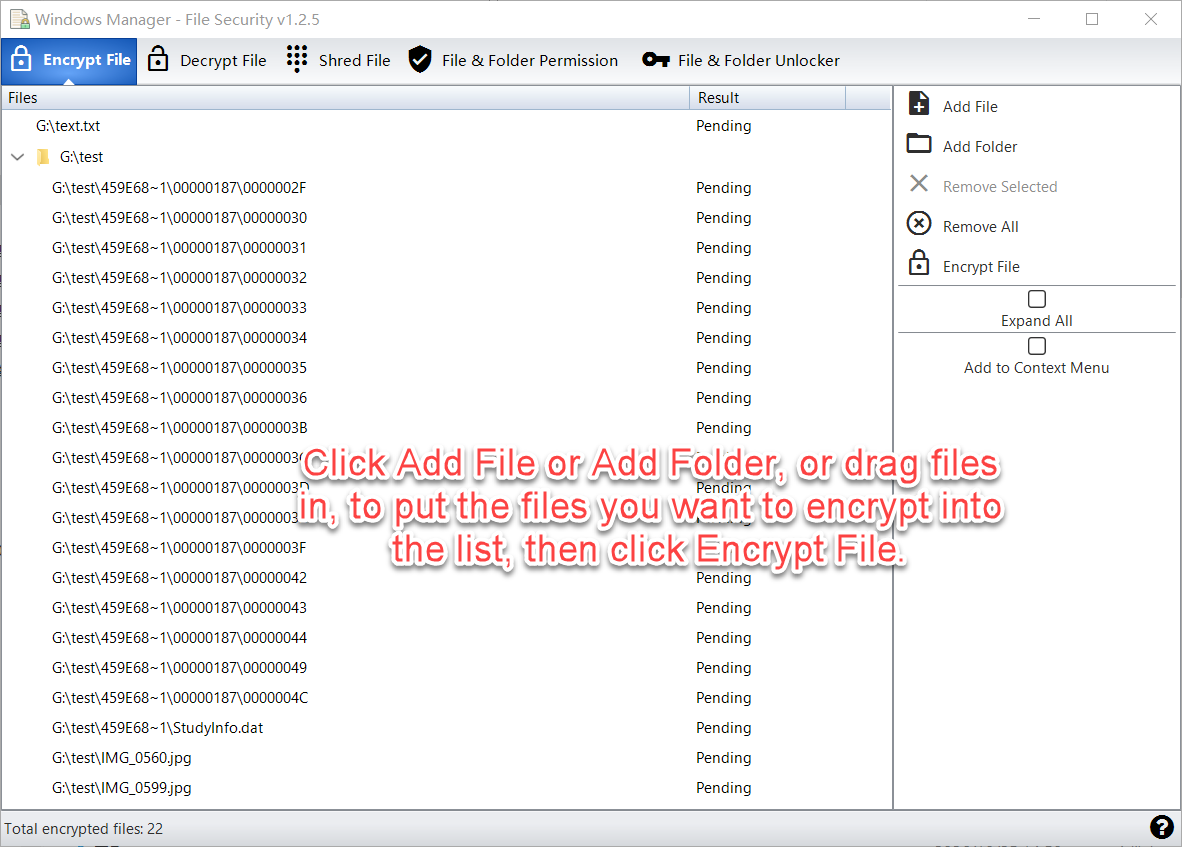
A folder is listed with the files inside it, including files in subfolders. Files that are already .lock files are skipped on this page. Expand All opens or closes every folder in the list. When the list is empty, Expand All is unavailable.
Before encryption starts, File Security asks for a password:
- Enter the password twice. The two entries must match.
- The password must be at least 3 characters and no more than 16 characters.
- A password hint is optional. The hint is stored with the .lock file and is shown when you decrypt. Do not type the password itself into the hint.
Encryption uses AES-256. When an item succeeds, the original file is replaced by a file of the same name with .lock added. Keep the password. There is no recovery if you forget it.
Succeeded items are shown in green. The status bar reports how many succeeded and how many failed.
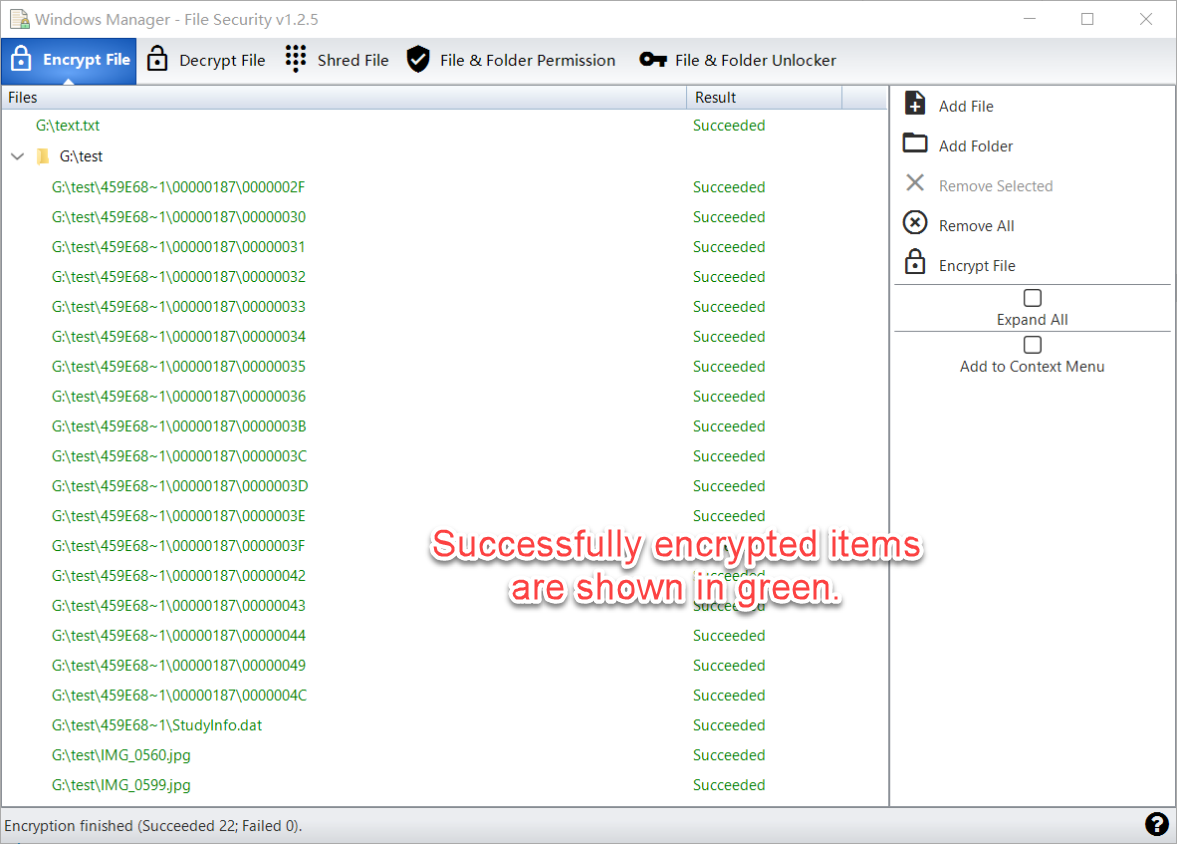
If a file is open in another program, encryption can fail. Unlock it first on the File & Folder Unlocker page, then encrypt it again.
4. Decrypt .lock files
On Decrypt File, add the .lock files, or a folder that contains them. You can also drag them in. Then click Decrypt File.
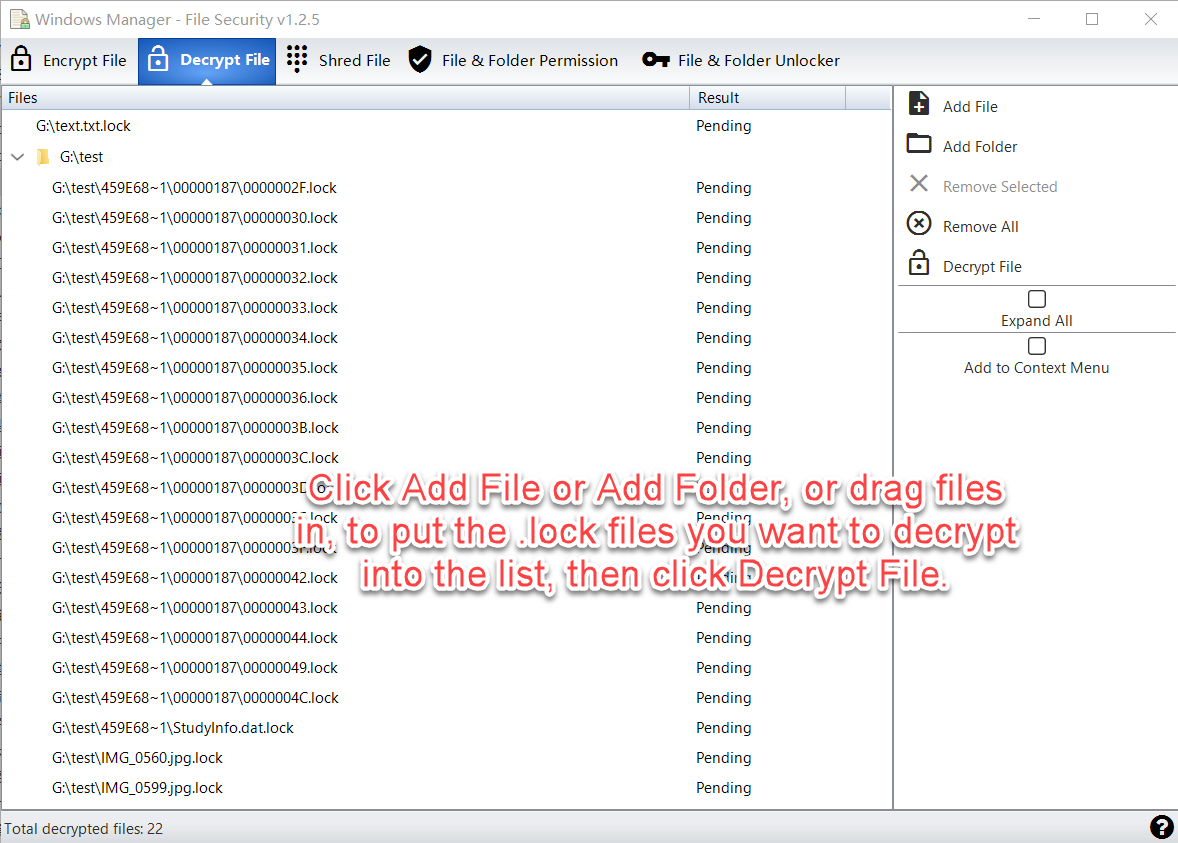
Double-clicking a .lock file in File Explorer opens File Security so you can decrypt it. If the file was saved with a hint, the hint is shown in the password window. Enter the password you used when encrypting. You do not type it twice on this page.
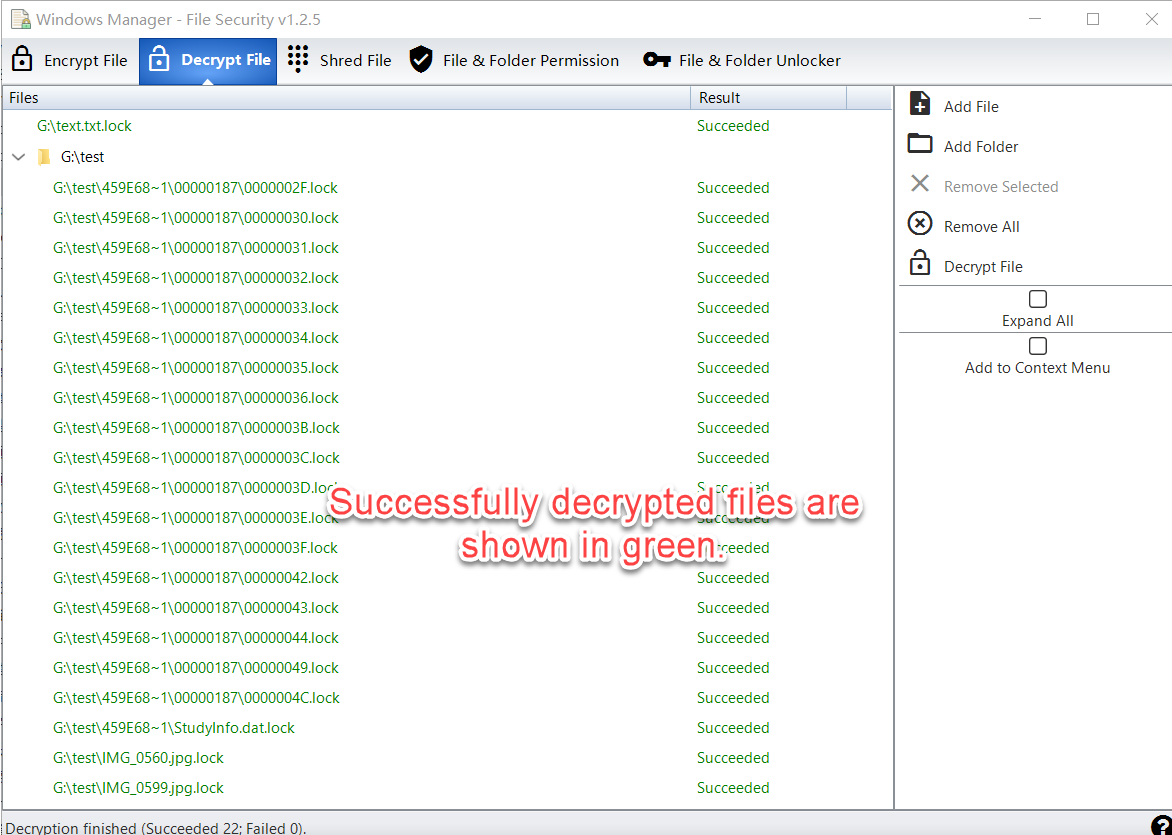
A successful decrypt removes the .lock file and writes the original file back. Succeeded items are shown in green.
These messages mean the file was not restored:
- Incorrect password. Try the password again. The hint, if there is one, is a reminder, not the password.
- The file may have been tampered with. The .lock file was changed after encryption.
- The file is not valid or The encrypted file is invalid. The file is not a File Security .lock file, or it is incomplete.
5. Shred files
Deleting a file, or even emptying the Recycle Bin, does not always erase the data. Shred File overwrites the file and then deletes it. Shredded files cannot be recovered.
Add the files or folders you want to destroy, or drag them in, then click Shred File.
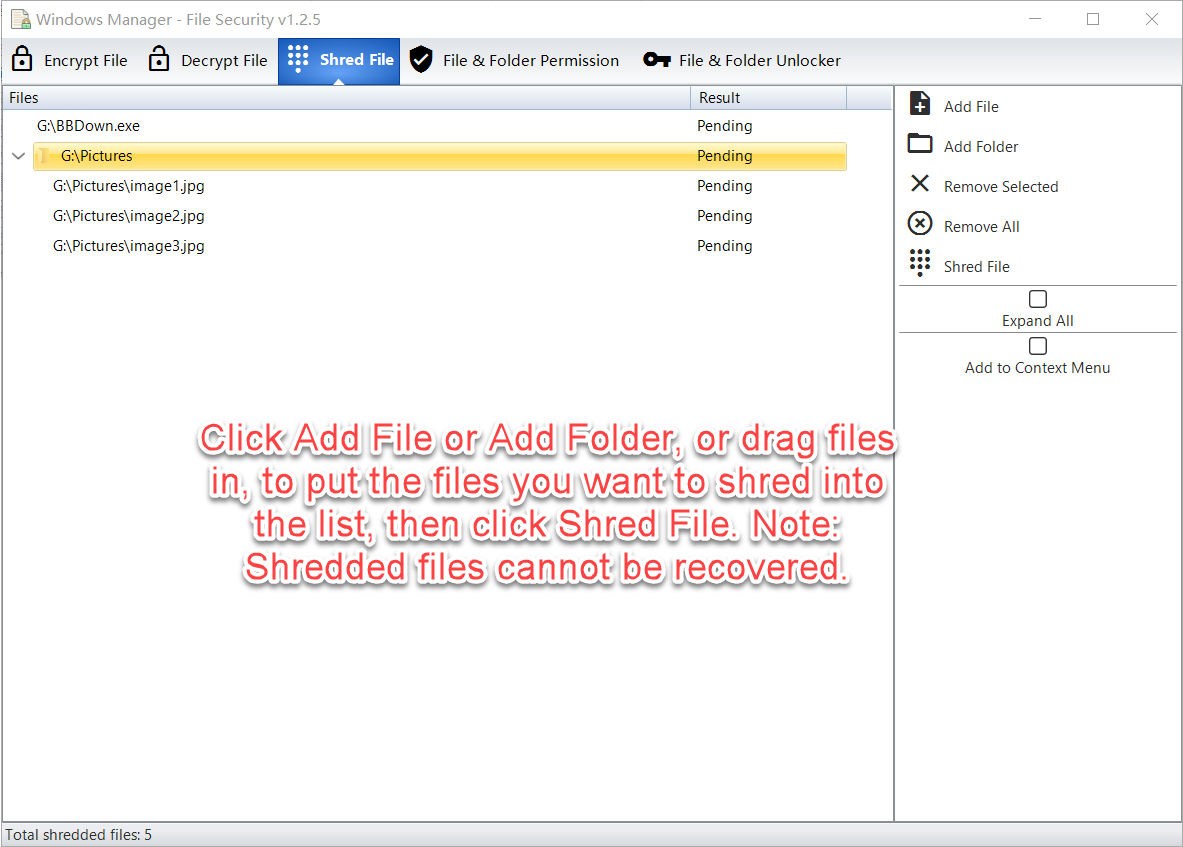
File Security asks you to confirm: Shredded files cannot be recovered. Do you really want to shred these files? Choose No if you are not sure. A folder entry includes the files inside that folder.
Succeeded items are shown in green. The status bar reports the shredding result.
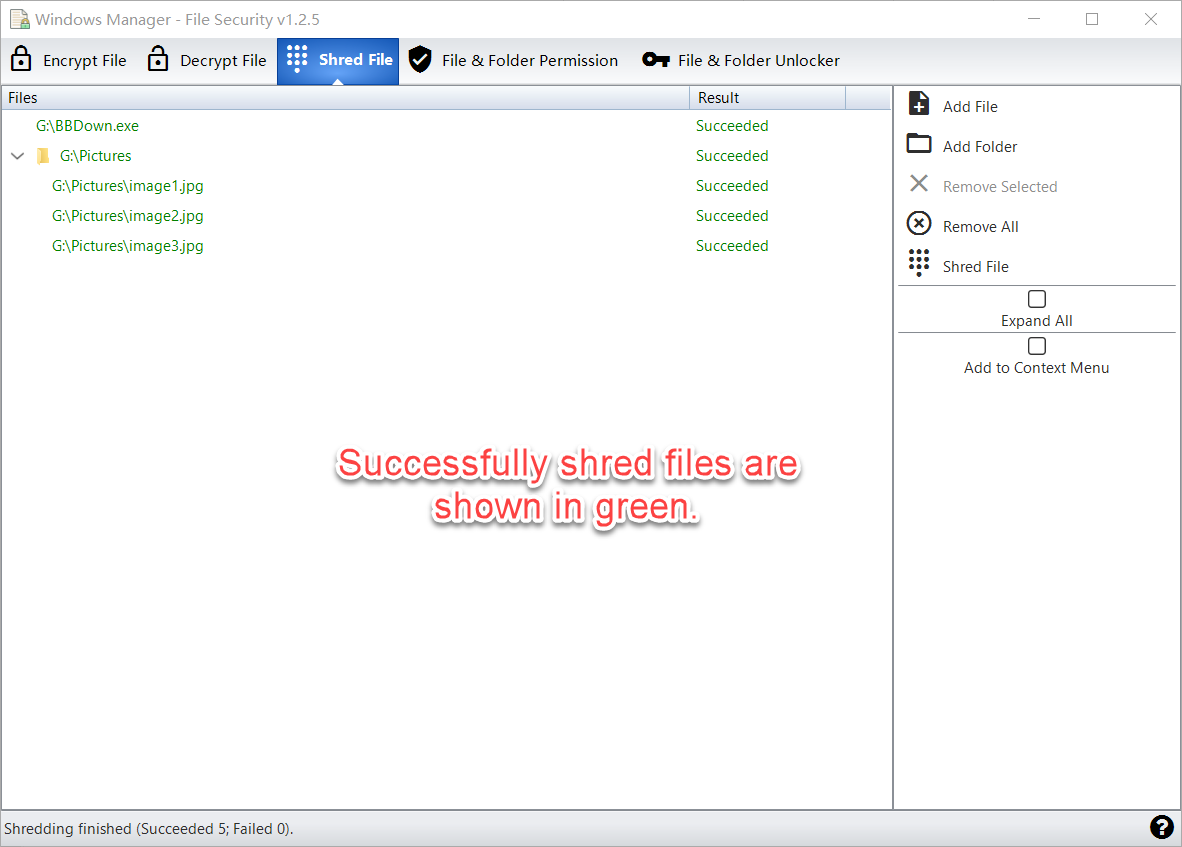
Do not shred Windows system files, program files you still use, or the only copy of a document you may need. If Windows says the file is open in another program, unlock it first, then shred it only if you still want it destroyed.
6. Set files and folders to read-only
File & Folder Permission changes NTFS permissions so the selected files and folders cannot be modified. This page works only on NTFS. If the drive is not NTFS, File Security reports that the operation is only supported on NTFS file systems.
Add files or folders with the buttons, or drag them from File Explorer into the list. The status column shows Full control or Read-only. Two options sit above the action buttons:
- Executable — allow executable files, such as EXE and BAT, to run. Leave this on when programs on the drive should still start.
- Undeletable — prevent files and folders from being deleted. Leave this on when the items must stay on the drive.
Both options are on by default. Click Set to Read-only to apply them. Click Remove Read-only to restore normal access for items that this tool set to read-only. Select All checks every item in the list. When the list is empty, Select All is unavailable.
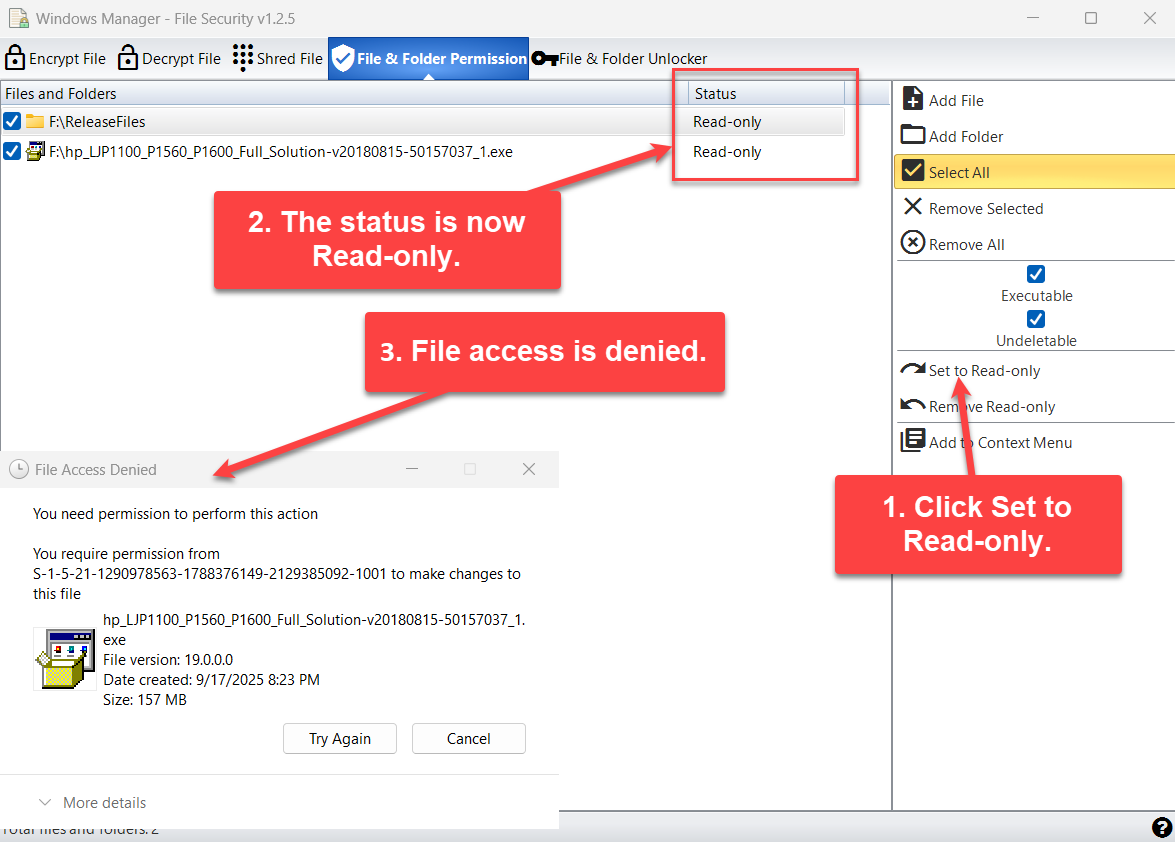
File Security does not add a drive root, such as C:\, or these system folders on any drive: Windows, Program Files, Program Files (x86), ProgramData, System Volume Information, $Recycle.Bin, Recycler, MSOCache, Documents and Settings, PerfLogs, and Recovery. Folders you create yourself, including folders on drive C:, can still be set to read-only.
A practical case is an NTFS USB flash drive. You can make the folders read-only and undeletable, while still allowing programs to run. After you plug that drive into another computer, other software cannot write to those folders or delete them. Do not use this on system files and folders. Changing permissions on Windows itself can stop the PC from working normally.
Setting a folder to read-only also applies to the files already inside it. Setting a single file does not rewrite every other file in the parent folder.
7. Unlock a file or folder that is in use
Windows will not let you change or delete a file that a program still has open. If a delete fails with a message that the file is open in another program, unlock it first.
On File & Folder Unlocker, add the file or folder, or drag it in from File Explorer. The status shows Locked or Not Locked. Select a locked item to see the processes that hold it: name, path, and PID. Click Unlock.
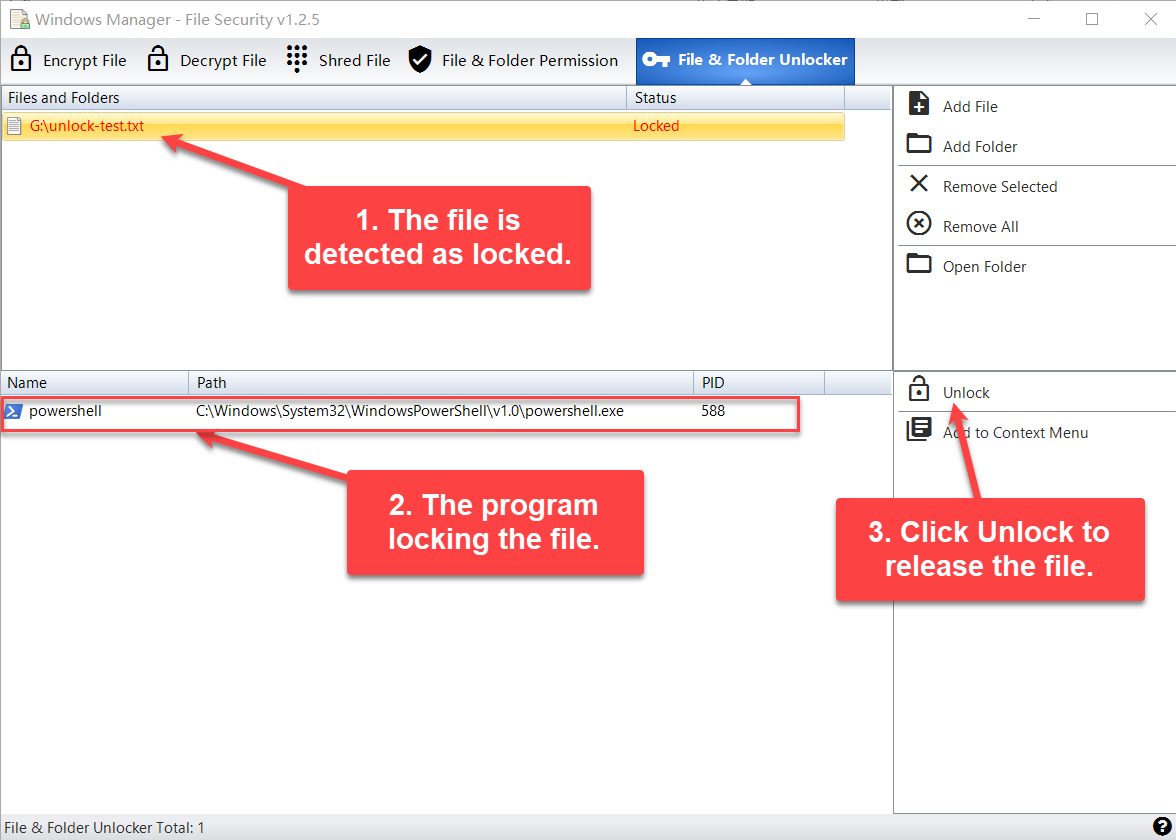
File Security asks you to confirm. It closes open handles where it can, then ends remaining processes in the list so the path can be modified. Open Folder shows the item in File Explorer.
Sometimes a program has finished with a file but has not released it. Unlocking clears that leftover lock. If the path is in use but no process can be identified, close File Explorer windows and any other program that might be using the folder, remove the item from the list, and add it again.
Unlocking and then deleting the wrong file can break a program that is still running. Do not unlock and delete files that should remain locked, including Windows system files.
8. Important notes
- The encrypt password cannot be recovered. Write it down and store it separately. The optional hint must not be the password.
- Encryption and decryption replace the file. A successful encrypt leaves the .lock file and removes the original. A successful decrypt does the reverse.
- Shredding is permanent. Confirm the list before you click Shred File. Remove Selected only drops an item from the list; it does not protect a file you leave in the list.
- Permissions are for NTFS only. FAT and exFAT drives cannot use this page. Drive roots and Windows system folders are left out of the list. Do not change permissions on system files.
- Executable and Undeletable are separate. A folder can stay undeletable and read-only while EXE and BAT files are still allowed to run. That is the setting to use on a portable NTFS drive.
- Unlock only what you intend to change. Ending the process that holds a file closes that program's work on the file. Leave system files locked.
- A file in use can block the other pages. If encrypt, shred, or a permission change fails because the file is open, use File & Folder Unlocker, then try again.
9. Typical workflows
Password-protect a folder of documents
- Open Encrypt File.
- Click Add Folder, or drag the folder in.
- Click Encrypt File, enter the password twice, and add a hint that does not reveal the password.
- Check that the result is green and that the files on disk now end in .lock.
Open those files later
- Open Decrypt File, or double-click a .lock file.
- Add the .lock files and click Decrypt File.
- Enter the same password. The original names are restored when decryption succeeds.
Carry programs on an NTFS USB drive
- Open File & Folder Permission and add the folders on the USB drive.
- Leave Executable and Undeletable checked.
- Click Set to Read-only. Programs can still run. Other computers cannot write to those folders or delete them.
Delete a file Windows says is in use
- Open File & Folder Unlocker and add the file.
- Select it, review the process list, and click Unlock only if that process is safe to close.
- Delete the file in File Explorer, or shred it if you need the contents overwritten.
Try it now
File Security is the Windows Manager tool for password-protected files, permanent shredding, NTFS read-only folders, and files that another program will not release. See the product page for the rest of Windows Manager.
Get started: Download Windows Manager, open File Security, and encrypt a copy of a document you can afford to test with before you protect the only original.
